Installation Procedure
![]()
Turn off the main switch of the copier and unplug the power cord before you start the installation procedure.
You need two or more persons to lift the copier. The copier is highly unstable when lifted by one person, and may cause injury or property damage.
Do not lift the copier with the paper feed unit installed. The handle and grips may be damaged.
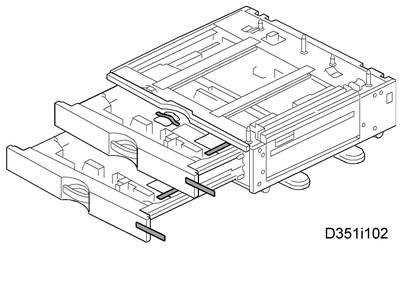
Remove all tape on the paper feed unit.
Remove the paper trays and remove all tape and padding.
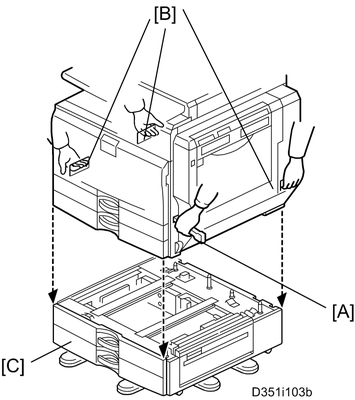
Grasp the handle [A] and grips [B] of the machine.
Lift the copier and install it on the paper feed unit [C].

Hold the handle and grips of the machine when you lift and move the machine.
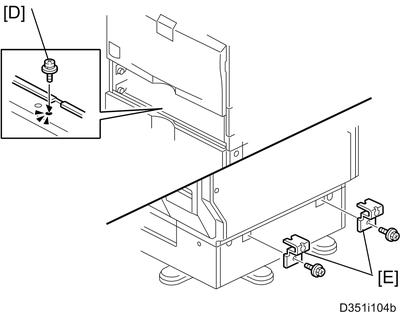
Remove trays 1 and 2 of the machine.
Fasten the spring washer screw [D].
Reinstall all trays.
Attach the securing brackets [E] (
 x 1 each; M4x10).
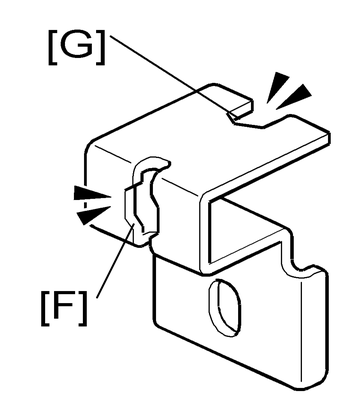
One of the securing brackets is used as a securing tool (the cutout [F] is used in step 6). But the cutout [G] is for attaching the tray heater. Therefore, attach the securing brackets [E] after installing the tray heater if you install the tray heater.
Load paper into the paper feed unit.
Turn on the main power switch of the machine.
Check the paper feed unit operation and copy quality.