Installation Procedure
![]()
Unplug the copier power cord before starting the following procedure.

Remove all tapes and shipping retainers.
Remove the two screws already installed at the top rear of the machine.
Insert the two stud screws [A] on the top of the machine.
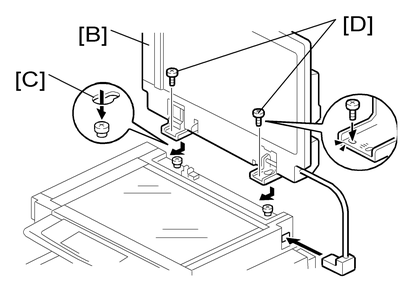
Mount the ARDF [B] by aligning the screw keyholes [C] in the ARDF support plate over the stud screws.
Slide the ARDF toward the front of the machine.
Secure the ARDF with the two knob screws [D].

Install the stamp cartridge [F] in the ARDF.
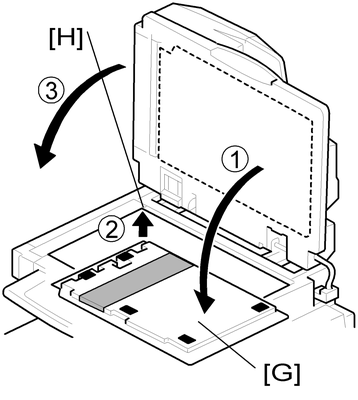
Peel off the platen sheet [G] and place it on the exposure glass.
Align the rear left corner of the platen sheet with the corner [H] on the exposure glass.
Close the ARDF.
Open the ARDF and check that the platen sheet is correctly attached.

Attach the decal [I] to the top cover as shown. Choose the language you want.
Plug in and turn on the main power switch of the machine, and then check the ARDF operation.
Make a full size copy. Check that the registrations (side-to-side and leading edge) and image skew are correct. If they are not, adjust the registrations and image skew referring to "Copy Adjustments" in the "Replacements and Adjustments” section.