Installation Procedure
![]()
Turn off the main switch of the copier and unplug the power cord before you start the installation procedure.
![]()
If you will install the 1-bin tray (D536) on the machine, install the 1-bin tray first before installing the side tray (D542). This makes it easier to do the following procedure.
Remove all tapes.
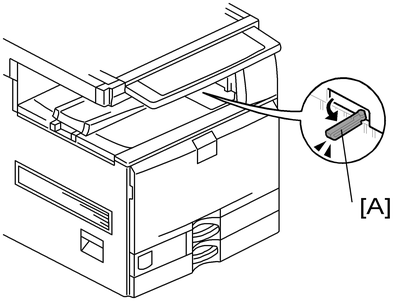
If the sensor feeler [A] is out, fold it into the machine.
Open the right door of the machine.
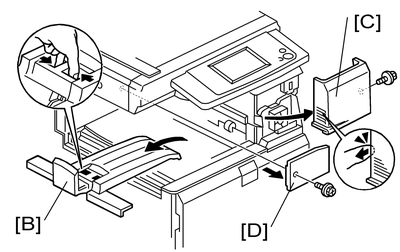
Remove the inner tray [B].
Remove the front right cover [C] (
 x 1).
x 1).Remove the connector cover [D] (
x 1).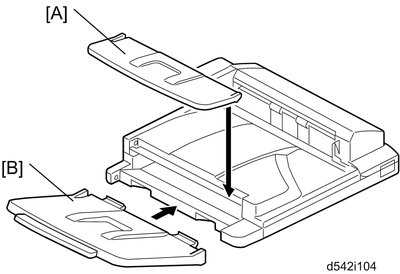
Attach the main output tray [A] and sub output tray [B] to the side tray unit.
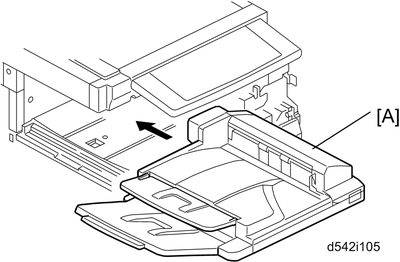
Install the side tray unit [A] in the machine.
Open the side tray cover [A].
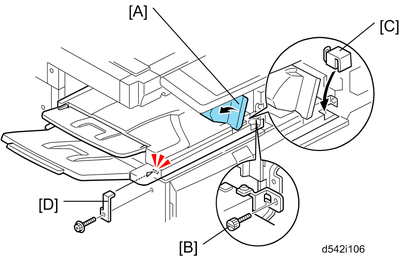
Secure the side tray unit with the knob screw [B].
Attach the frame cover [C].
Reinstall the front right cover to the machine, and then close the right door of the machine.

Open the side tray cover [A] when installing the front right cover. Otherwise, you cannot reinstall it.
Install the holder bracket [D] (
x 1)Turn on the main power switch of the machine.
Check the side tray operation.