Installation Procedure
![]()
Unplug the copier power cord before starting the following procedure.
![]()
1. If you will install the 1-bin tray (D536) in the machine, install the 1-bin tray before you install the bridge unit (D386). This will make it easier for you to do the following procedure.
2. If you will install a finisher (B408, B804 or B805) in the machine, install the finisher after you install the bridge unit (D386).
Remove all tapes.
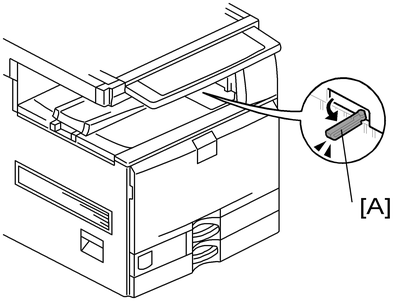
If the sensor feeler [A] is out, fold it into the machine.
Open the right door of the machine.
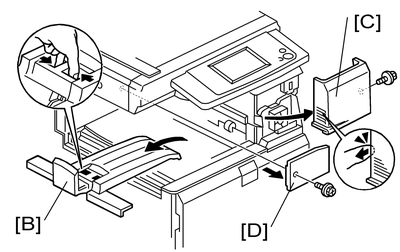
Remove the inner tray [B].
Remove the front right cover [C] (
 x 1).
x 1).Remove the connector cover [D] (
x 1).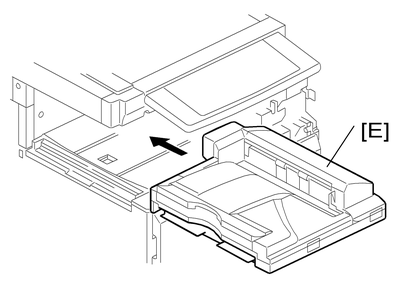
Install the bridge unit [E] in the machine.
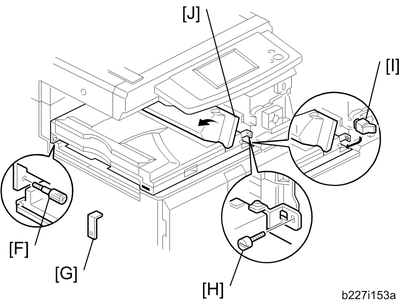
Secure the bridge unit with the knob screw [F] and screw [H].
Attach the frame cover [I].
Reinstall the front right cover in the machine. Then close the right door of the machine.

Open the bridge unit cover [J] when installing the front right cover. Otherwise, the bridge unit cover is an obstacle for attaching the front right cover.
Install the optional finisher (refer to the finisher installation procedure).
If you will not install the finisher at this time, install the holder bracket [G]. Otherwise, the customer will damage the bridge unit if they pull up the bridge unit tray. When you install the finisher, you will need this bracket during the installation procedure.
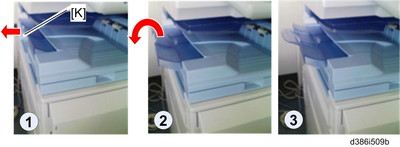
Pull the extension tray [K] only if the 1000-sheet finisher (B408) is to be installed in the main machine.
Turn on the main power switch of the machine.
Check the bridge unit operation.