Installation Procedure
![]()
Unplug the main machine power cord before starting the following procedure.
The bridge unit (D386) and optional paper feed unit (D537 or D538) must be installed before installing this finisher (B793).
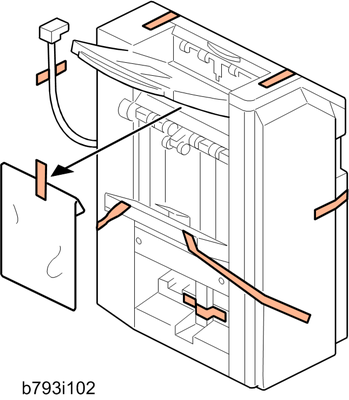
Unpack the finisher and remove all tapes and packing materials from the finisher.
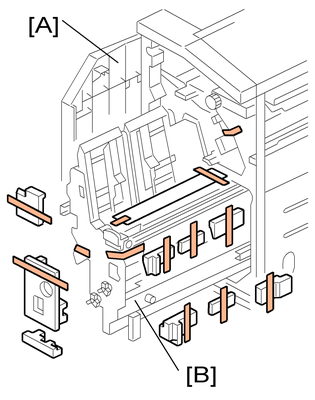
Open the front door [A] of the 1000-sheet booklet finisher, and then pull out the jogger unit [B].
Remove all tapes and packing materials from the inside of the finisher.
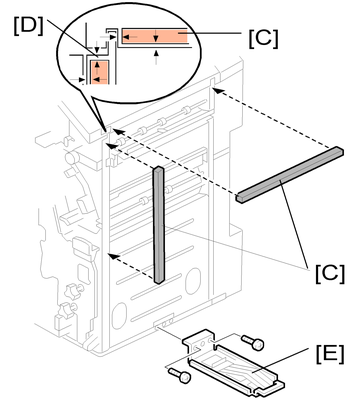
Attach the cushions [C] to the finisher.

Make sure that the cushions are placed within 0 to 1 mm [D] from the edge of the cover or frame.
Install the ground plate [E] on the finisher (
 x 2; M3 x 8).
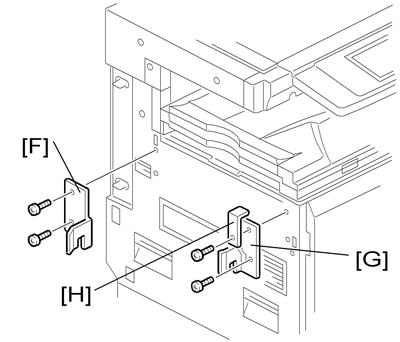
Attach the rear joint bracket [F] (
x 2, M4 x 14).Attach the front joint bracket [G] and the holder bracket [H] (
x 2; M4 x 14).The holder bracket [H] must be placed outside the front joint bracket [G]. The holder bracket is provided with the bridge unit (D386).
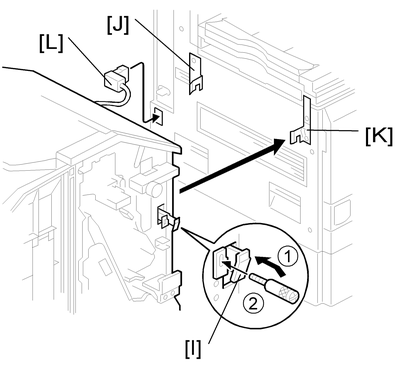
Pull the lock lever [I] (Long knob screw x 1).
Slowly push the finisher to the left side of the machine, keeping its front door open until the brackets [J] [K] go into their slots.
Push the lock lever [I], and then secure it (Long knob screw x 1).
Close the front door of the finisher.
Connect the finisher connector [L] to the machine.
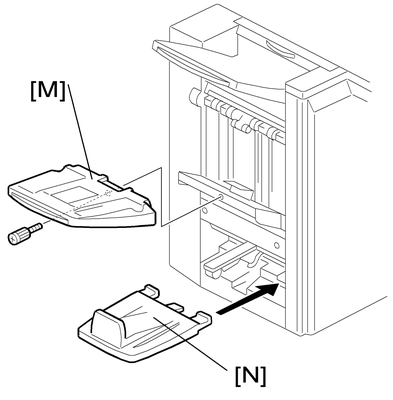
Install the upper output tray [M] (Short knob screw x 1).
Install the lower output tray [N].
Turn on the main power switch of the machine.
Check the 1000-sheet booklet finisher operation.