Installation
![]()
Unplug the main machine power cord before starting the following procedure. If the 1000-sheet booklet finisher has been installed, disconnect it and pull it away from the machine.
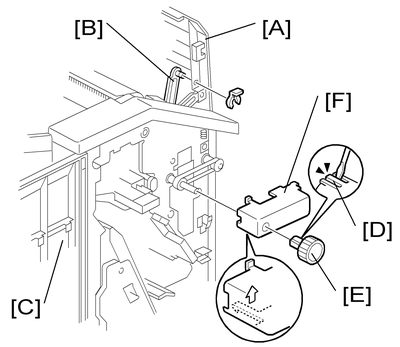
If the finisher is connected to the machine, disconnect it.
Open the top cover [A] and then release the guide arm [B] (
 x 1).
x 1).Open the front door [C].
Pull the hook [D] up then remove the knob [E].
Timing belt cover [F].
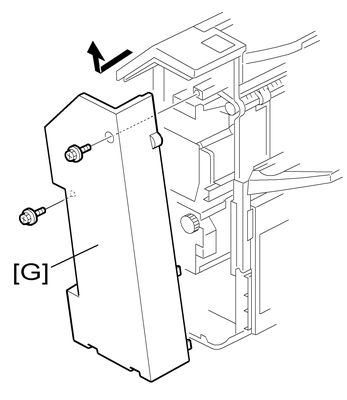
Rear cover of the 1000-sheet booklet finisher [G] (
 x 2).
x 2).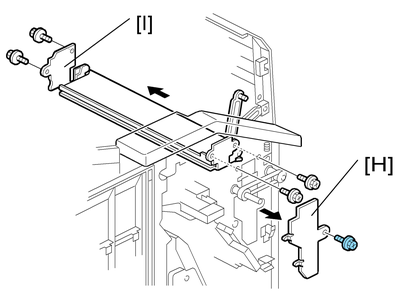
Cover bracket [H] (
x 1)Remove the paper guide plate [I] from the rear side (
x 4).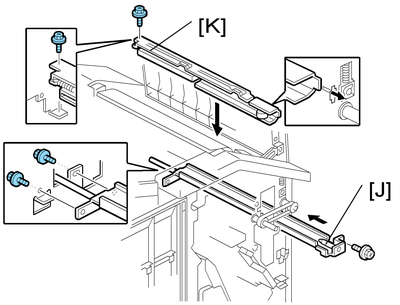
Install the punch unit stay [J] from the front side (
x 3).Install the sub-scan registration sensor guide [K] from the top (
x 1).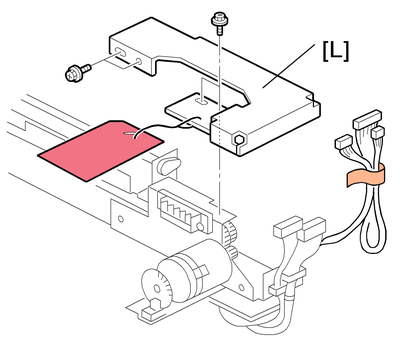
Remove the bracket [L] from the punch unit (
x 1).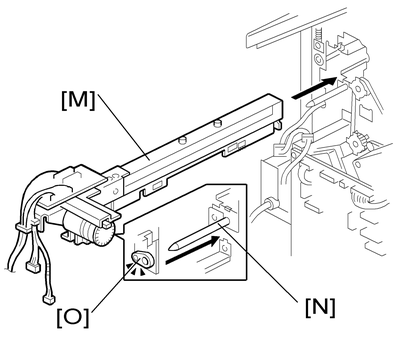
Install the punch unit [M] along the punch unit stay from the rear side.
Make sure to put the punch unit stay pin [N] through the hole [O].
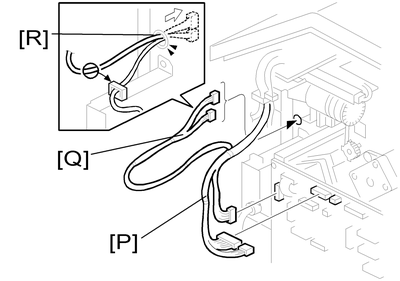
Connect the harnesses [P] to the main PCB.
Put the harnesses [Q] through the hole [R] in the rear frame (
 x 1).
x 1). 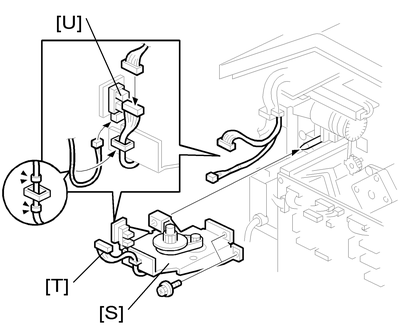
Install the punch drive motor [S] on the rear frame (
x 2).Connect the drive motor harness [T] to the harness from the punch unit (
x 1). Connect the home position sensor harness from the punch unit to the home position sensor [U].
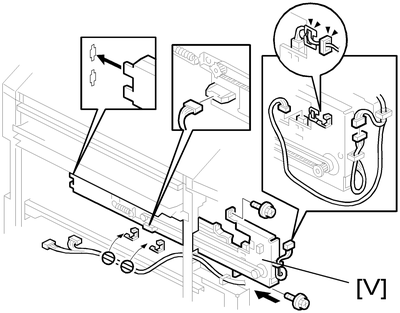
Install the sub-scan registration sensor unit [V] from the rear side (
x 2).Route and connect the harnesses as shown (
x 2).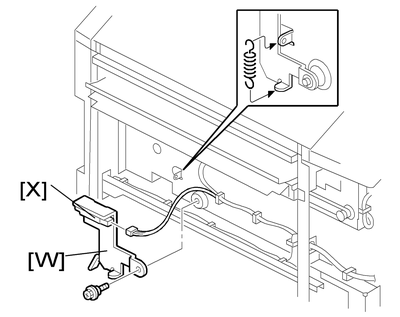
Install the hopper full sensor arm [W] (
x 1, spring x 1).Connect the harness from the sub-scan registration sensor unit to the hopper full sensor [X].
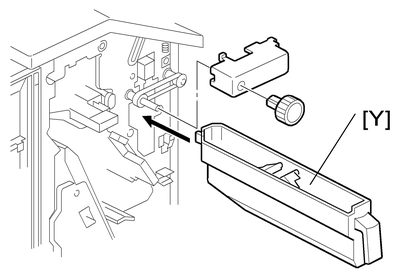
Install the hopper [Y] from the front side.
Reinstall the timing belt cover and knob.
Reinstall the rear cover (
x 2).Close the front door and top cover.
Install the 1000-sheet booklet finisher on the copier.
Plug in and turn on the main power switch.
Check the 1000-sheet booklet finisher operation.