Heating Roller and Heating Roller Bearing
Fusing unit (
 Fusing Unit
 )
)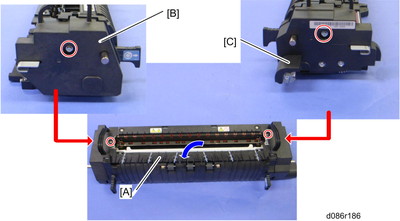
Open the jam removal door [A].
Front fusing cover [B] (
 x 2; Stepped screws)
Rear fusing cover [C] (
x 2; Stepped screws)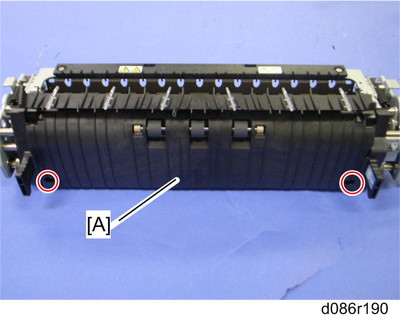
Fusing right cover [A] (
x 2; Stepped screws)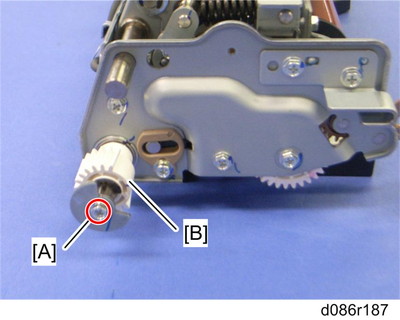
Pressure roller contact shaft actuator [A] and pressure roller contact shaft gear [B] (
x 1,  x 1)
x 1)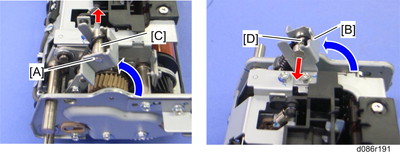
Turn both pressure levers [A] [B], and pull out pins [C] [D].

If the pins [C] [D] are not pulled out in this step, the fusing unit frames may become bent.
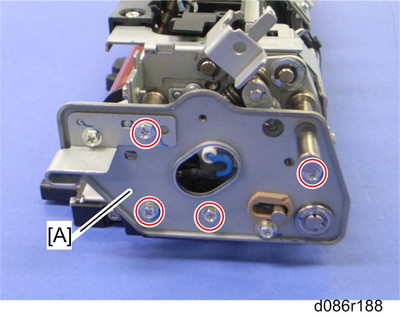
Front bracket [A] (
x 4)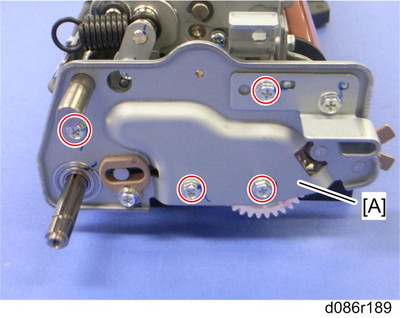
Rear bracket [A] (
x 4)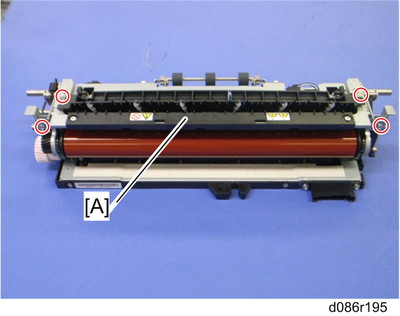
Top stay [A] (
x 4)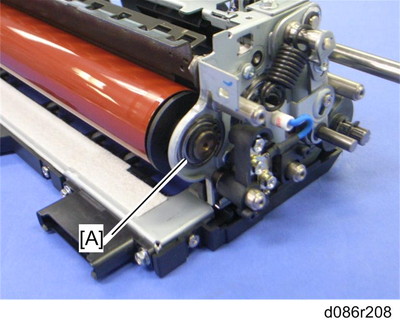
Heating roller bearing [A] at the front side (C-ring x 1)

Fusing drive gear [A]
Heating roller gear [A] (C-ring x 1)
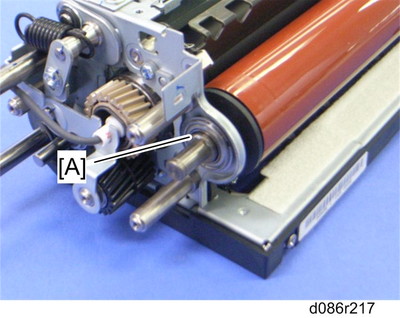
Heating roller bearing [A] at the rear side
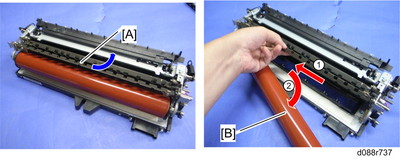
Keep the heating roller stripper plate [A] open, and then remove the heating roller [B].
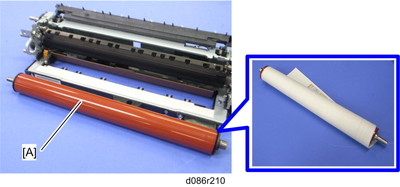
Heating roller [A]

The surface of the heating roller is fragile, so the heating roller must be covered with a sheet of paper when it is placed on a table or floor.