Procedure
Turn the main power switch OFF.
Insert the SD card into slot 2. Then turn the power ON.
Enter SP mode.
Select the “Printer Sp”.
Select SP-1001 "Bit Switch”.
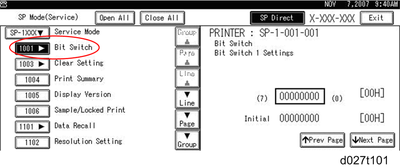
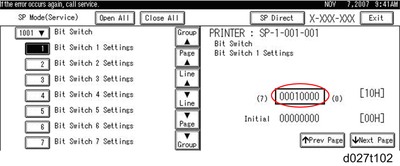
Select “Bit Switch 1 Settings” and use the numeric keypad to turn bit 4 ON and then press the “#” button to register the change. The result should look like: 00010000. By doing this, Card Save option will appear in the “List/Test Print” menu.
Press “Exit” to exit SP Mode.
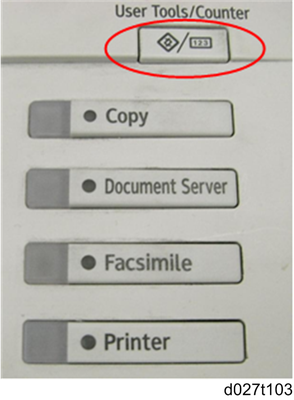
Press the “User Tools/Counter” button.
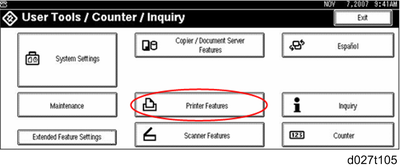
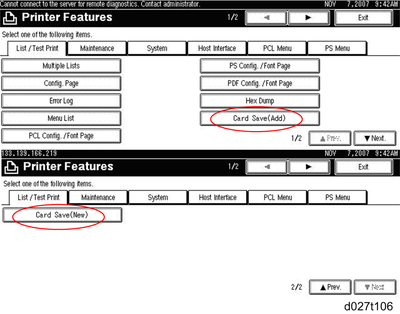
Select “Printer Features”.
Card Save (Add) and Card Save (New) should be displayed on the screen. Select Card Save (Add) or Card Save (New).
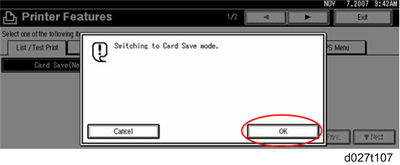
Press “OK” and then exit the “User Tools/Counter” menu.
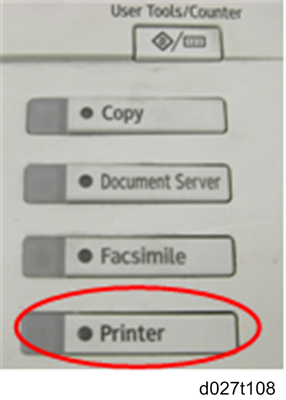
Press the “Printer” button.
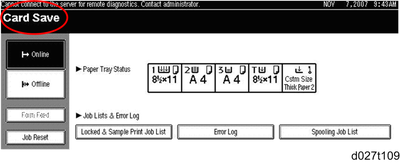
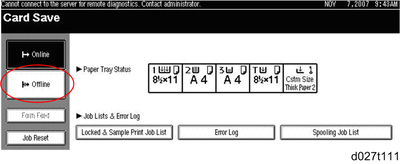
Card Save should be displayed in the top left of the display panel.
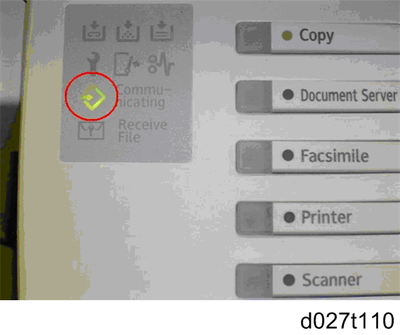
Send a job to the printer. The Communicating light should start blinking as shown below.
As soon as the printer receives the data, it will be stored on the SD card automatically with no print output. Nothing is displayed on the screen, indicating that a Card Save operation was successful.
Press “Offline” and then the “Clear/Stop” button to exit Card Save mode.
Change the Bit Switch Settings back to the default 00000000. Press the “#” button in the numeric keypad to register the changes.
Remove the SD card after the main power switch is turned off.