For Installing the Tray Heater in D387
Remove the rear cover of the mainframe (
 step 1 in For Installing the Tray Heater in D537).
Pull out the tray in the optional paper tray.
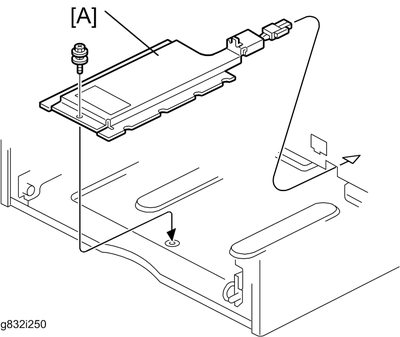
Install the tray heater [A] in the optional paper tray (
 x 1).
x 1).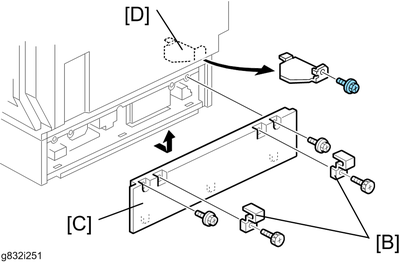
Remove the two securing brackets [B] (
x 1 each), and then the rear cover [C] of the optional paper tray ( x 2).Remove the harness cover bracket [D] (
x 1).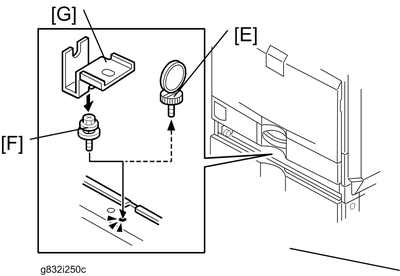
Pull out tray 2 from the mainframe.
Replace the shoulder screw [E] with the washer screw [F], using securing bracket [G] (
x 1).

Connect the harness [H] to the connector [I] of the tray heater.
Route the harness [H] as shown and clamp it with four clamps (
x 4).
Make sure that the harness [H] is placed below the harness [J].
Connect one harness [K] of the two-way harness to the connector [L] of the mainframe.
The harness [K] of the two-way harness, which has two binds, is for the connector of the mainframe. The harness [M], which has one bind, is for another optional paper feed unit.
Clamp the other harness [M] of the two-way harness as shown [N] if you do not install another optional paper feed unit.
Reassemble the mainframe and optional paper tray.
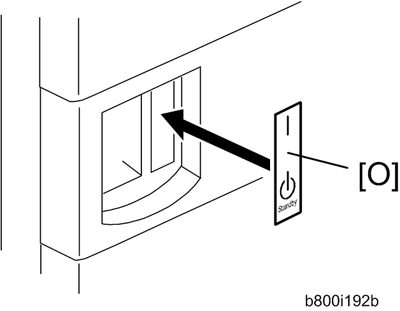
Attach the on/standby decal [O] to the right-hand side of the main power switch.