Drum Unit and Development Unit
The new drum unit has a front cover and a front joint. When you attach the new drum unit to the development unit, remove a front cover and a front joint at first.
And use them for reassembling the new drum unit and development unit.
If you install a new drum unit, set SP 3902-xxx to "1".
Black: 3902-009
Yellow: 3902-010
Cyan: 3902-011
Magenta: 3902-012

If you do this, then the machine will reset the PM counter for the drum unit automatically, after you turn the power on again.
Turn the machine power off.
PCDU (
 PCDU
PCDU )
)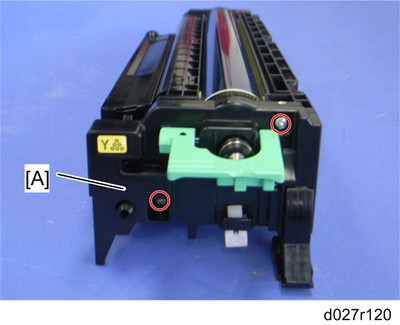
Front cover [A] (
 x 2)
x 2)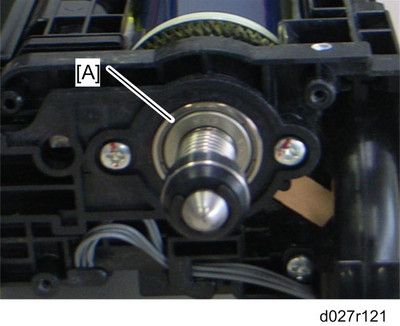
Do not touch the bearing [A] after removing the front cover. The bearing is properly applied with lubricant.
Remove the bushing [A] of the development roller at the rear of the PCDU (
 x 1).
x 1).
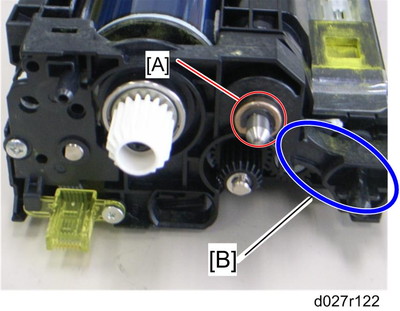
Do not put too much weight on the PCDU. Otherwise, the plastic frame [B] of the development unit may be damaged.

Remove the front joint [A] (
x 2,  x 1).
x 1).The front joint [A] is firmly set. Remove it with a flat screwdriver.
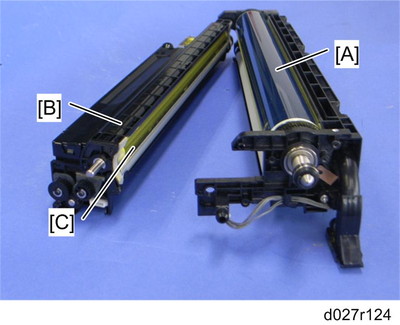
Drum unit [A] and Development Unit [B]
When the development unit is removed from the drum unit, clean the entrance mylar [C] with a vacuum.
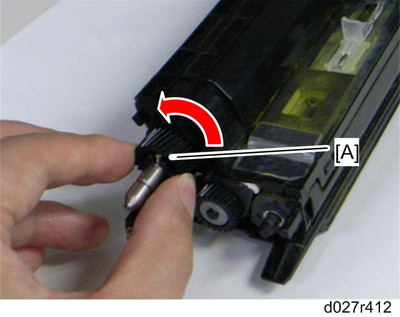
Rotate the development roller [A] five or six times in the counterclockwise direction.
This step removes developer that has stuck to the development roller, which would cause color unevenness.
If you change the development unit, do the ACC procedure.
Execute the drum phase adjustment with SP1902-001 twice.
When reassembling the PCDU:
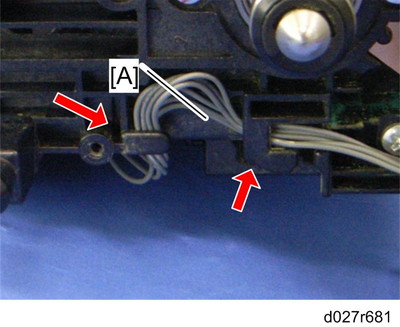
Make sure that the harness [A] is hooked as shown.