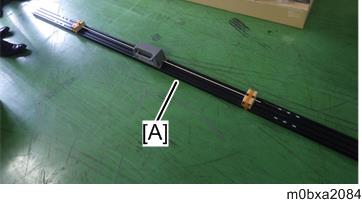
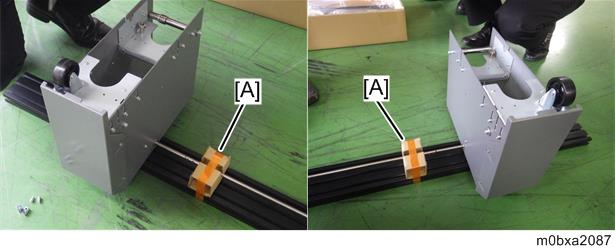
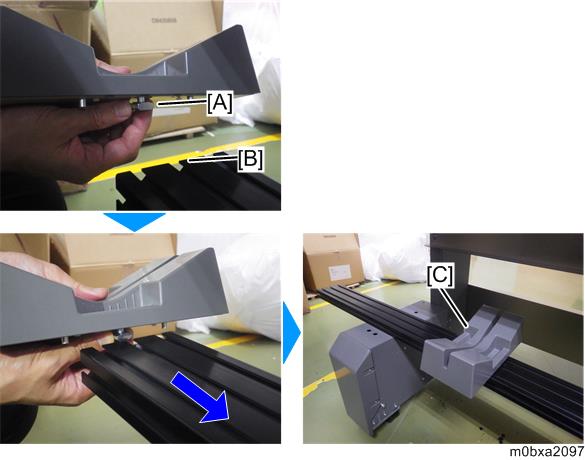
- Lay the stay [A] on the floor as shown below.
Set the paper feed caster unit [B] to the right side of the stay by inserting the projections [A] of the right side of the stay to the pinholes [C] of the paper feed caster unit.
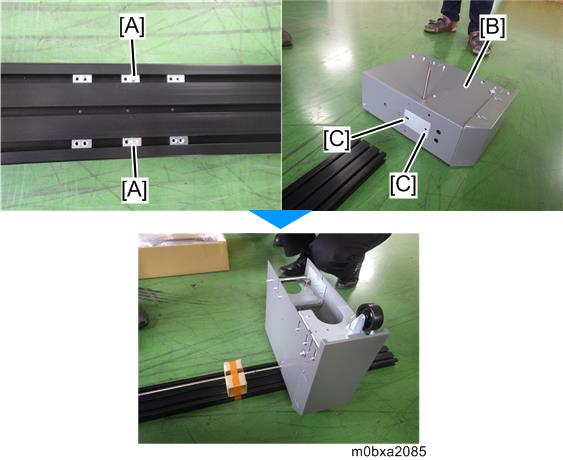

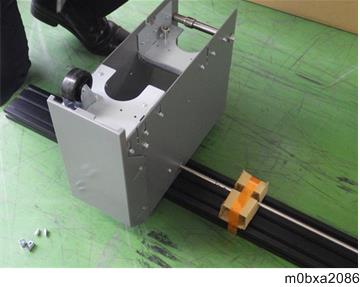
When setting the paper feed caster unit on the stay, make sure that the wheels of the paper feed caster unit are positioned on the front side.
Similarly set the holes of the paper feed caster unit to the projections of the left side of the stay.
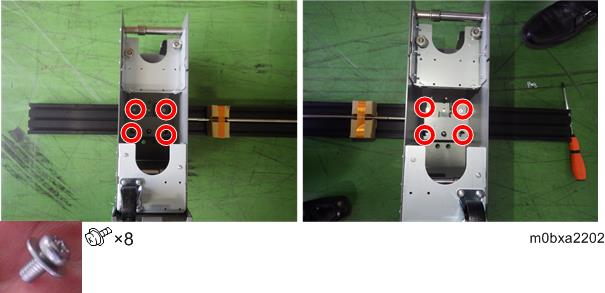
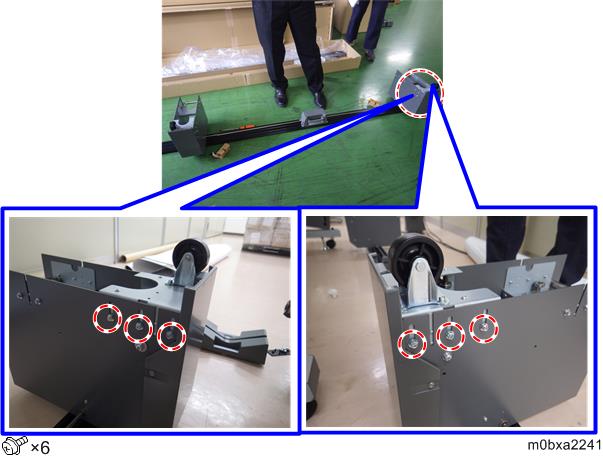
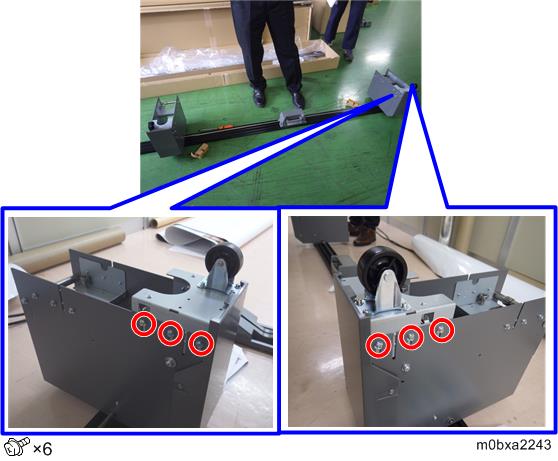
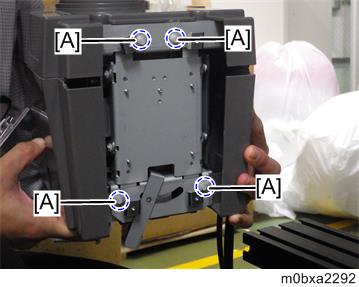
- Fix the paper feed caster units on the stay. (SCREW:POLISHED ROUND:M4X8)
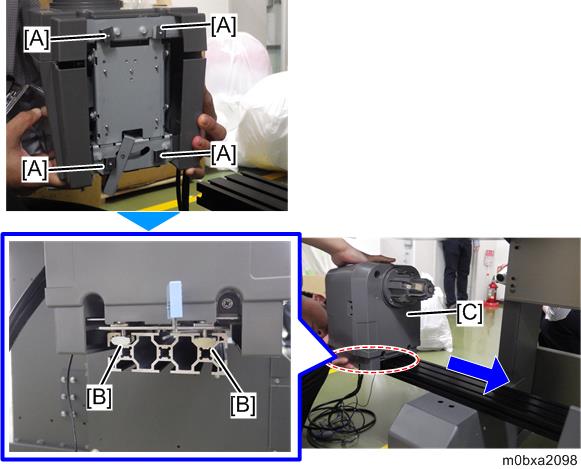
- Remove the retainers [A].
- Fix the support shafts [B] and [C] to the shaft [A] of the stay. (SCREW:SPRING WASHER:ROUND POINT:M4X10)
Put the screws in the stay from the side with the lever (non-threaded side), and then fix the stay.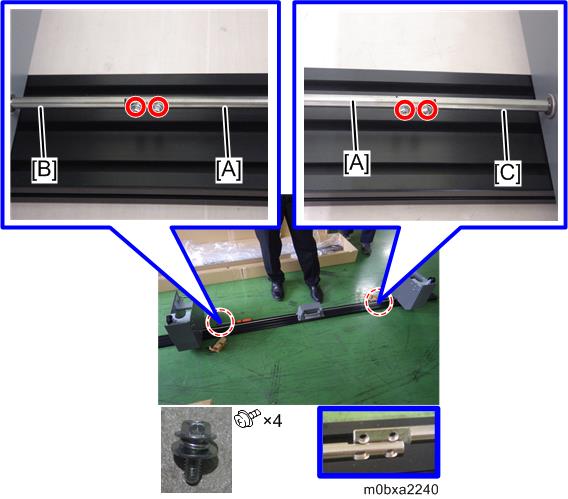
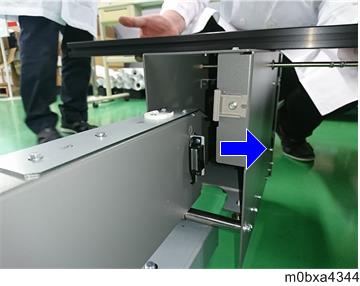
- Loosen the screws of the caster unit.
- Pull out the caster unit [A] fully.
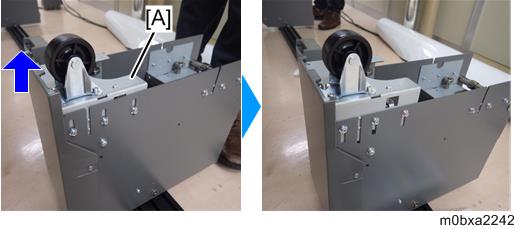
- Tighten the screws of the caster unit.
Install the other roll holder in the same way.
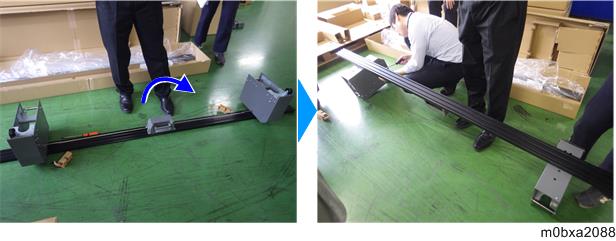
Loosen the screws of the caster unit, pull out it fully, and then tighten the screws of it.- Turn the stay with the paper feed caster units upside down.
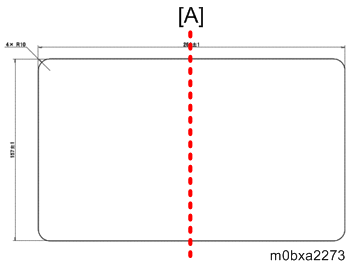
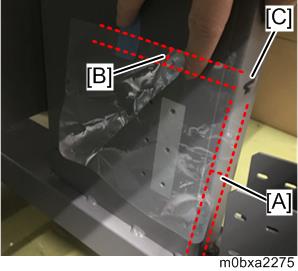
- Cut the protection sheet along the center broken line [A].
Attach the protection sheet [A] to the printer stand [B].
The picture below shows inside. Also attach it to the outside in the same way.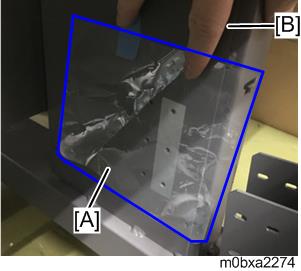
[A]: The right end of the sheet is out of the front side of the stand and the extra length is 10 to 15 mm. (approx. 0.394 to 0.591 inch)
[B]: The upper end of the sheet exceeds the height of the T-shaped hole [C] by 5 to 10 mm. (approx. 0.197 to 0.394 inch)
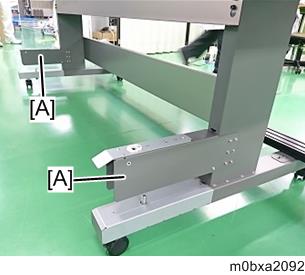
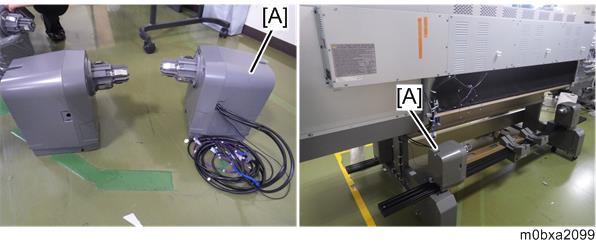
Attach the paper feed support stays [A] to the printer stand.
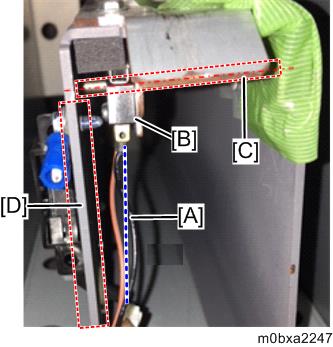
- Attach the paper feed support stay with the harness [A] to the rear left side [B] of the main unit.
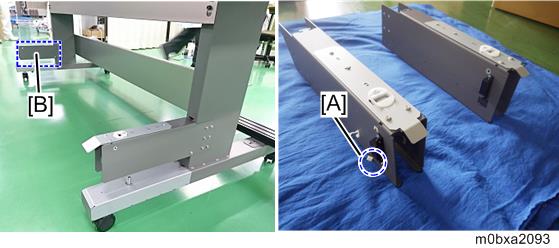
- Attach the paper feed support stay with the harness [A] to the rear left side [B] of the main unit.
Remove the paper feed stand front cover [A].
Bend the harness [A] so that the harness is under the roll feed unit set switch [B].
Prevent the harness touching the shaft [C] and the bracket [D].
- Remove the protection sheet attached to the printer stand.
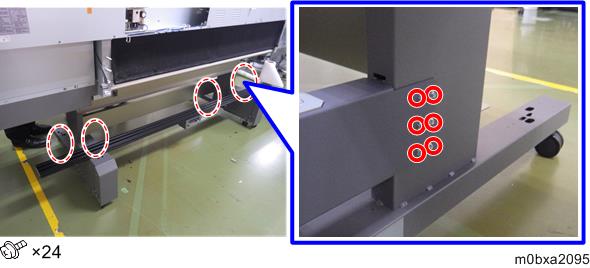
Fix the inside and outside of the paper feed support stays (left/right) with the screws. (HEXAGONAL BOLT:DOUBLE SCREW:M4X12)
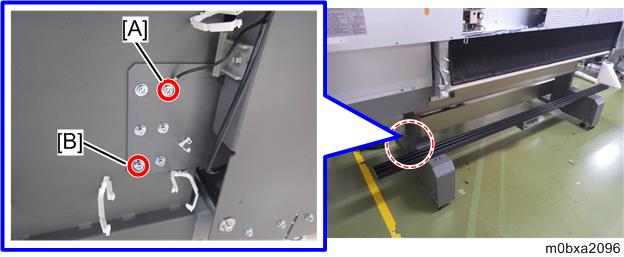
The screw [A] of the left side of the main unit is fastened with the ground cable of the roll holder.
Temporarily fix the screw to the position [B] for fixing the ground cable of the roll core holder with it later.
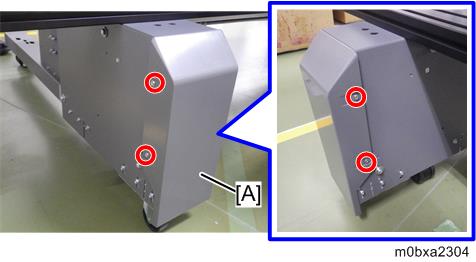
Insert the legs [B] of the printer stand under the pole section [A] of the paper feed caster unit.
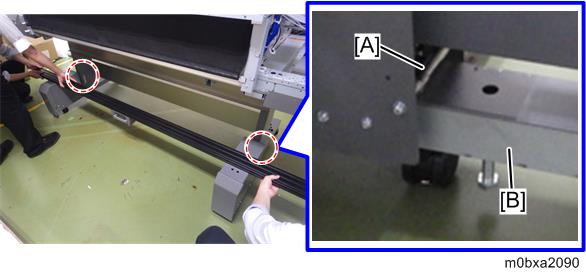
- The stopper magnet can interfere with the paper feed stand. Insert the leg while shifting it to the left side seen from the rear side of the main machine.
- The stopper magnet can interfere with the paper feed stand. Insert the leg while shifting it to the left side seen from the rear side of the main machine.
- Insert the nut [A] of the media support [C] into the groove [B] of the left edge of the stay, and then slide the media support towards the right. Attach the media support on the right edge of the stay in the same way.
Insert the nuts [A] of the roll holder [C] into the grooves [B] of the left edge of the stay, and then slide the roll holder towards right to install the roll holder on the left side of the stay.
- Attach the roll holder [A] which has the harness and no switches to the rear left side of the stay.
- Carefully attach the roll holder not to drop the small white rubbers [A] attached on the bottom of the holder. The absence of the rubber might lower the power of fixing the holder to the stay.
- Attach the roll holder [A] which has the harness and no switches to the rear left side of the stay.
In the same way, attach the other roll holder to the right of the stay.
The two holders that have no harness are compatible with each other. Therefore, either holder can be attached to the edge of the stay.
- Attach the retaining part (nut) [A] to the one side of the groove of the stay, and then attach the end cap [B].
In the same way, attach the retaining part and the end cap to the other side of the groove of the stay.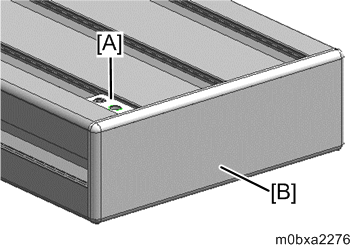
- Clean the grooves of the stay, and then check if there is no dust on the groove.