The procedures for changing the ink combination from 4C+W model to 4C model are as follows:
4C Model
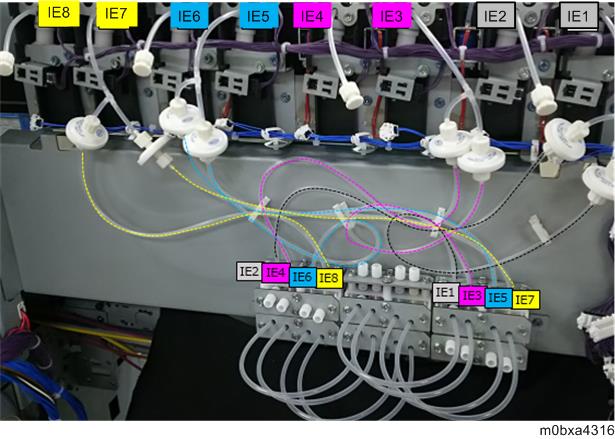
IE: Ink End Detection

When installing, make sure to insert tubes and stoppers correctly.
When routing tubes, be careful not to bend the tubes or make scratches on the tubes.
- Remove the rear left cover. (Removing the Rear Left Cover)
- Remove the left upper cover [A]. (Changing the Joints of Branch Section and Connecting Circulation Tubes)
- Attach the sealing materials (MTLLP-2) [B] to the joint [A] of the tube extending from the ink end detection [IE2].
Connect the joint [E] branching from the T-shaped joint [D] and the joint [C] of the tube extending from the solenoid valve [V2].
The picture below shows the solenoid valve V1/V2.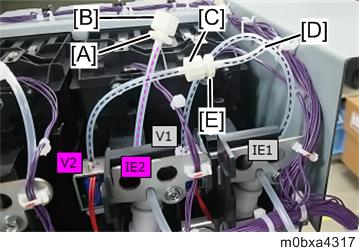
Connect tubes of the other solenoid valves (V3/V4, V5/V6, and V7/V8) in the same procedure.
- Attach the sealing materials (FTLLP-1) [B] to the joint [A] of the tube extending from the ink end detection [IE2].
Connect the joint [D] branching from the T-shaped joint [C] and the joint of the filter upper side [E].
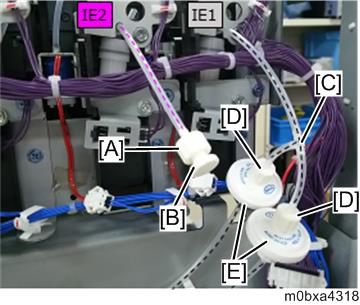
Connect tubes of the other ink end detections (IE3/IE4, IE5/IE6, and IE7/IE8) in the same procedure.
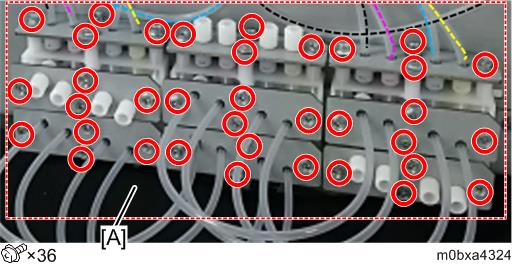
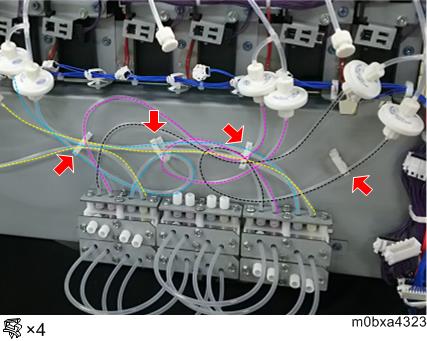
- Loosen all the screws retaining the joint branch unit [A] by rotating about from one to one and half times with a driver.
- Connect the eight tubes for solenoid valve [A], the eight tubes for joint section [B], and the 12 stoppers for joint section [C] as shown below.
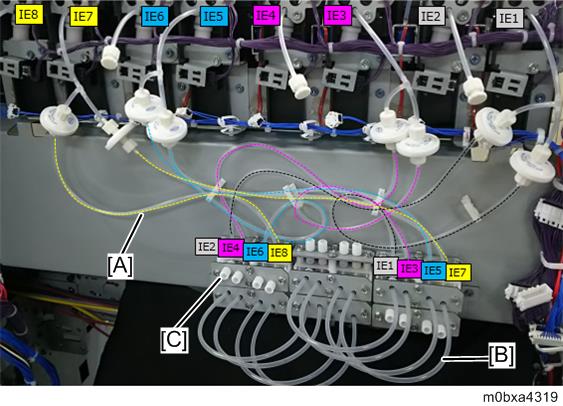
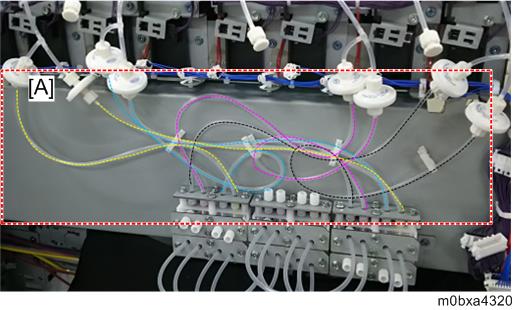
- The eight tubes for solenoid valve [A]
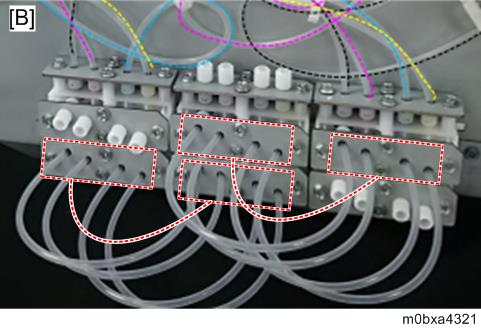
- The eight tubes for joint section [B]
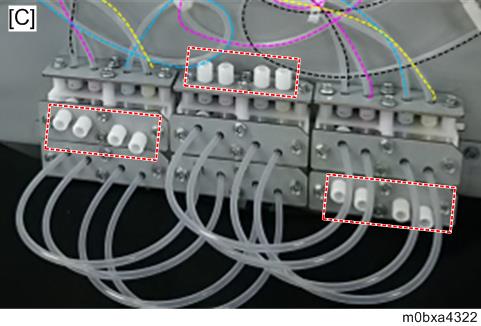
- The 12 stoppers for joint section [C]
- The eight tubes for solenoid valve [A]
- Tighten all the loosen screws in step 7.
Fix the tubes.
Be careful not to bend the tubes.
- Attach the left upper cover.
- Attach the rear left cover.