Never open the middle cover or raise the lever during printing. Opening the cover or raising the lever will abort printing.
This section explains how to adjust the media feed quantity if image quality defects such as horizontal misalignments or image surface irregularities occur.

- Before adjusting the sub-scan direction feed amount, perform head cleaning. (Performing Head Cleaning)
Check for the following:- There is no media floating or skewing.
- The heaters reach a temperature appropriate for use.
- Printing the test pattern consumes ink. Perform this function only when necessary.
- Perform no other operations while the test pattern is printing.
- An error will occur and test pattern will not print if:
- There is a misfeed.
- One of the machine's covers is open.
- The machine is performing maintenance operations.
- The machine has run out of ink.
- The machine has run out of media.

- This section explain how to adjust the media feed quantity. When adjusting the media feed quantity manually, refer to Operating Instructions.
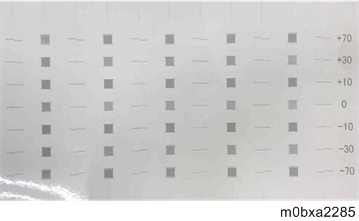
- The machine prints the test pattern of the media feed adjustment, and then adjusts the media feed quantity automatically.
When adjusting the white ink head (head 2), perform the adjustment manually.
- The pattern for manual adjustment:
- Check that the media is set.
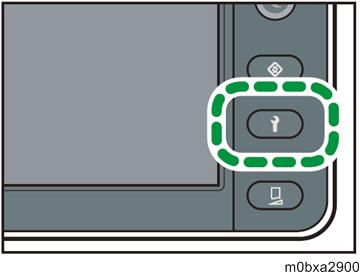
- Press the [Standard Procedure] key.
- Press [Media Feed Adjustment].
- Press [Auto].
When using the machine in 4C condition, select from [6 Pass] or [8 Pass / 12 Pass / 16 Pass / 32 Pass].
When using the machine in 4C+W condition, select from [6 Pass], [8 Pass / 12 Pass / 16 Pass], or [32 Pass / 12 Pass (White)].
Press [Execute].
The test pattern of the media feed adjustment is printed, and then the media feed quantity adjustment is performed.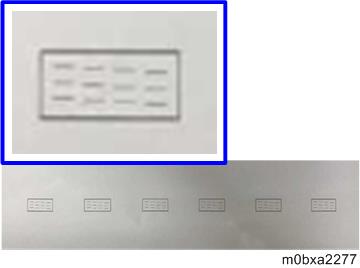
- Press [Confirm].
- Press [End].
If auto adjustment is failed, adjust the sub-scan direction feed amount manually.
NG 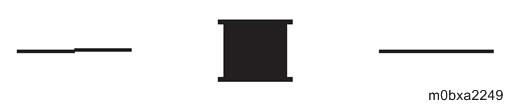
OK 
NG