Before You Begin
- Remove any media from the platen.
- Select [Default] in [Head Height] in the [Standard Procedure] on the operation panel.
- Lower the media holding lever.
- Before adjusting, turn the main power off.
Adjustment Procedure
- Decap the carriage unit. (Moving Away the Carriage Unit)
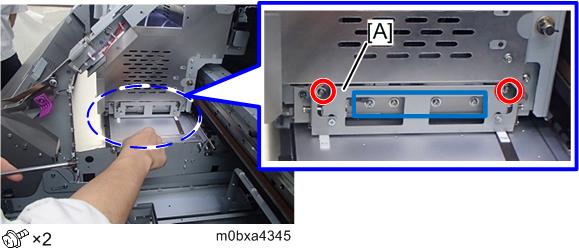
- Loosen the two screws, and then move the left and right jam detection feelers to the highest position.
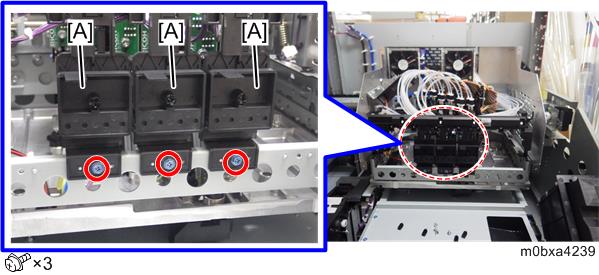
- Remove the port brackets [A] for air purging.
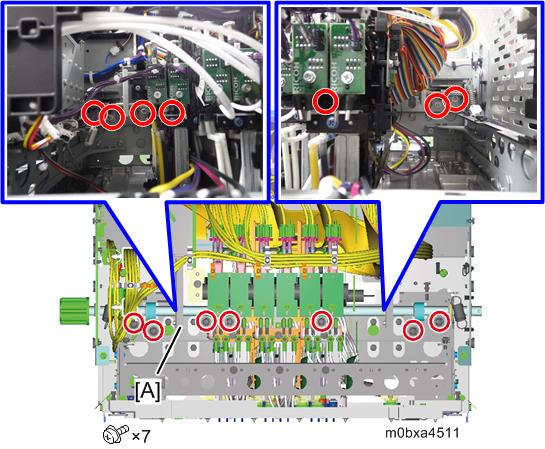
- Loosen the seven fixing screws on the guide [A] of the rear side of the carriage unit.
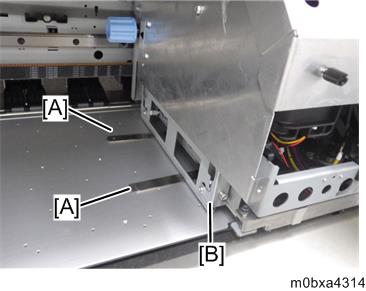
- Rotate the left and right screws [B] to adjust the height of the print heads of the carriage unit [A].
One rotation of the screw clockwise lifts the print head by 0.9 mm (approx. 0.035 inch).
One rotation of the screw counterclockwise lowers the print head by 0.9 mm (approx. 0.035 inch).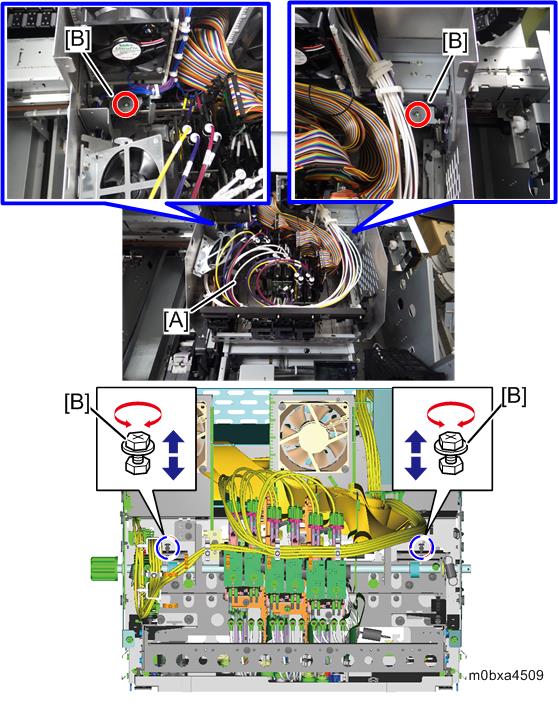
- Measure the distance between the platen and the surface of each head nozzle at the three points of the platen (right edge, middle, left edge) to make sure that they are within the extent of 1.8 ± 0.2 mm (approx. 0.071 ± 0.008 inch).
- Put the gap gauge (1.8 mm (approx. 0.071 inch)) [A] on the platen.
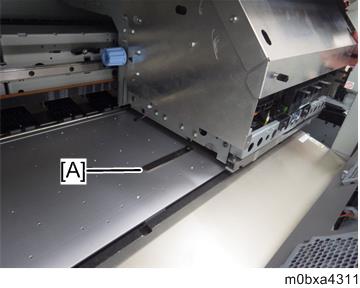
- Move the carriage to the center of the platen to pass the carriage above the gap gauge.
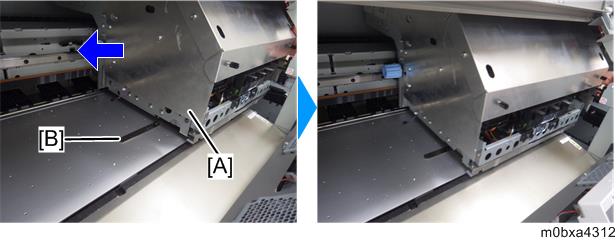
- Check if the gap gauge is out of position.
- Place the gap gauge (1.9 mm (approx. 0.075 inch)), and slide the carriage. Make sure that the gauge is shifted from the original position.
- Put the gap gauge (1.8 mm (approx. 0.071 inch)) [A] on the platen.
- After adjusting, tighten the screws loosened in step 4.
Put the two gap gauges [A] on the front side and rear side of the platen, lower the jam detection feeler [B] above the gap gauge, and then tighten the screws to fix it.