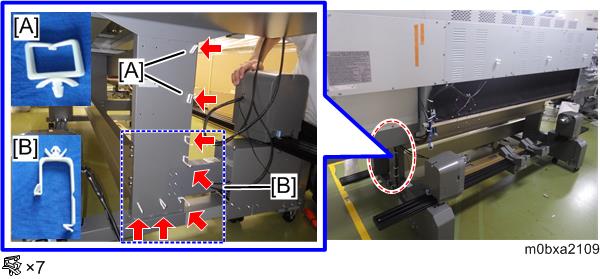
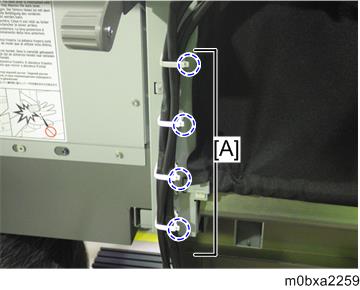
- Attach the clamps [A] and [B] to the right side of the printer stand.
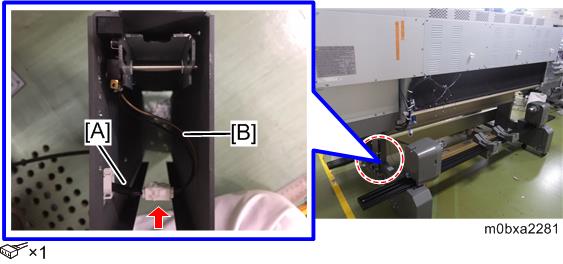
- Connect the harness connector [A] of the roll holder to the connector [B] of the paper feed support stay.
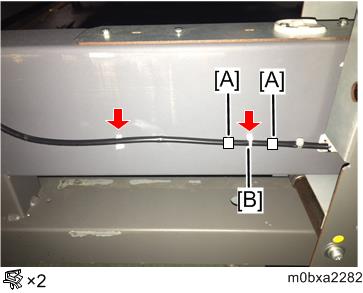
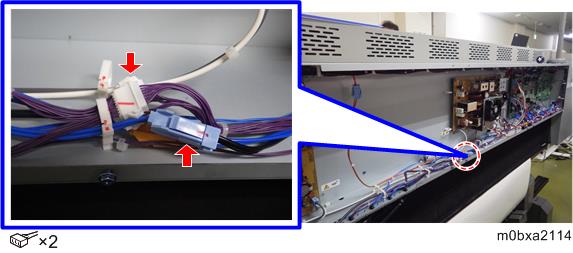
Fix the harness with the binds [A] and the clamp [B] so that the clamp is sandwiched between the binds.

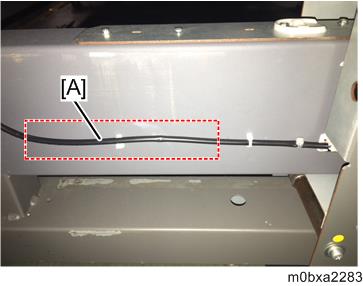
Route the harness around the area [A], removing the slack.
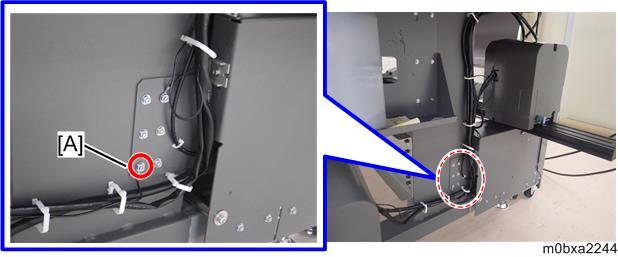
Fix the ground cable of the roll core holder to the position [A].
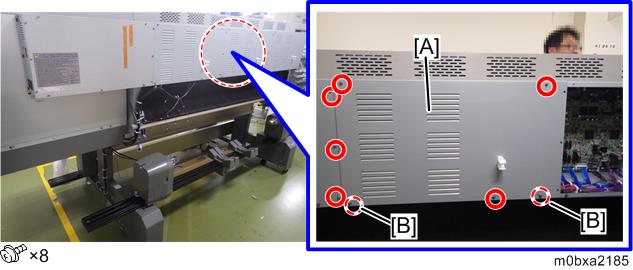
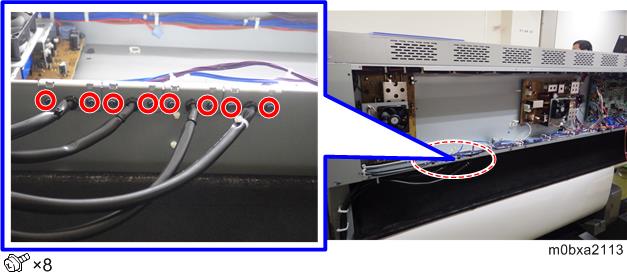
- Remove the controller box right cover 1 [A].
When removing the controller box right cover 1, loosen the screws [B].
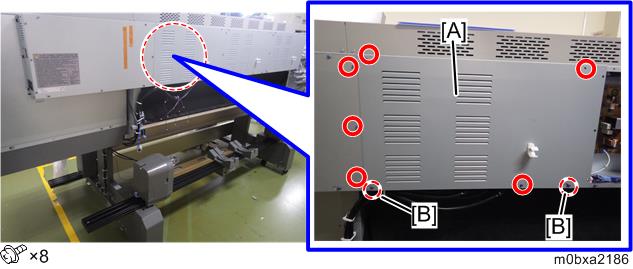
Remove the controller box right cover 2 [A].
When removing the controller box right cover 2, loosen the screws [B].
Remove the controller box right cover 3 [A].
When removing the controller box right cover 3, loosen the screws [B].
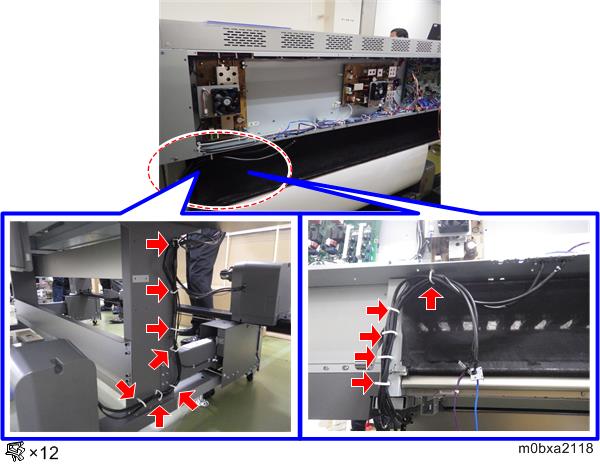
- Attach all the four harness brackets of the roll holder and the roll core holder to the main unit as shown below.
- [A] : harness brackets of the roll holder
- [B] : harness brackets of the roll core holder

Fix the four harness brackets from underside. (TAPPING SCREW - M3X6)
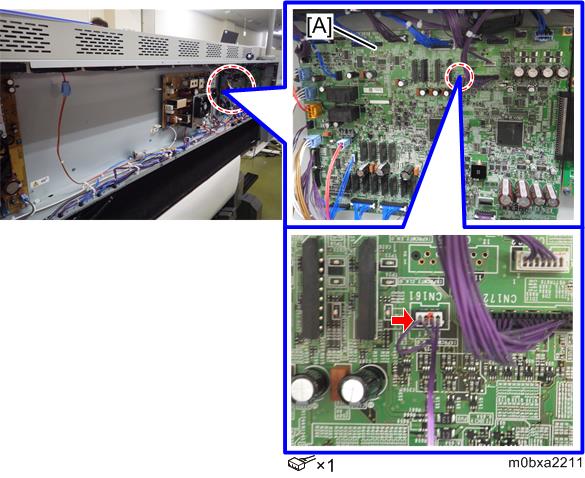
- Connect the harnesses of the roll holder to the harnesses inside of the controller box.
- Connect the harness of the roll holder (connector for the roll feed unit set switch) to CN161 on the IOB [A].
- Connect the harnesses of the roll core holder to the harnesses inside of the controller box.
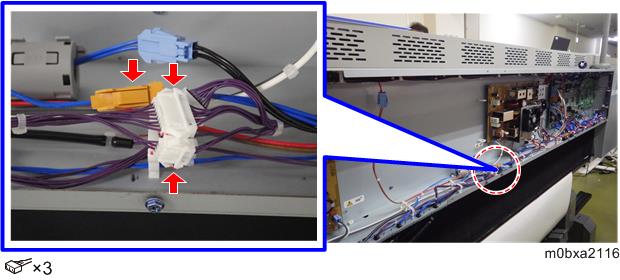
Secure the harnesses of the roll holder and the roll core holder with clamps.
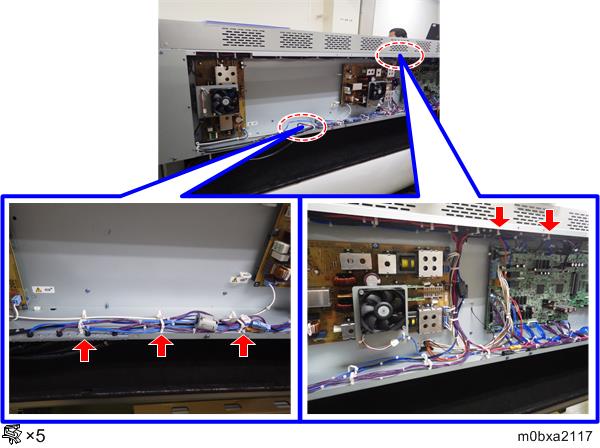
Make sure that the snap-fits [A] of the clamps face inside of the machine.
- Reattach the controller box right cover 1, 2, 3.
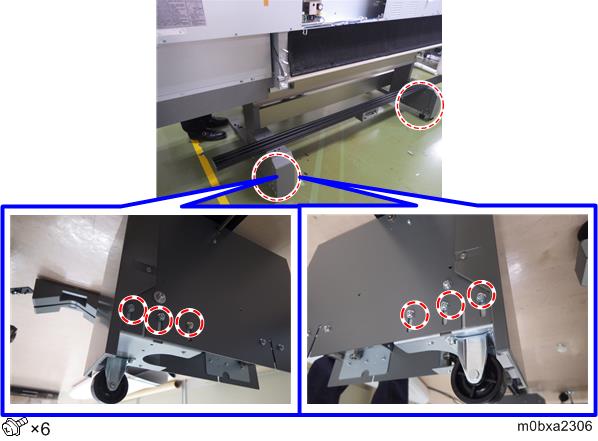
- Loosen the screws of the caster unit, raise the casters to the highest position, and then tighten the screws.